
如何拍摄紫外线激发的荧光照片?
How to Capture Ultraviolet-Induced Fluorescence (UVIF) Photos
当物体中的分子被高能紫外线波长(来自我们的紫外线手电筒)激发(激发),能够发射出可见光(红色、绿色和蓝色)时,就会发生紫外线诱导荧光(UVIF)。这些发射的较长波长的光线就是我们需要拍摄的荧光。
Ultraviolet-induced fluorescence (UVIF) occurs when molecules in an object are excited (energized) by high-energy ultraviolet wavelengths (from our UV flashlight) and as a result, emit longer wavelengths in the visible portion of the spectrum (red, green, and blue). These emitted longer wavelengths are what we are photographing.

警告:紫外线会对眼睛和皮肤造成严重伤害。使用紫外线灯时,务必佩戴适当的紫外线防护用品。切勿直视紫外线光源。
首先,找一个完全黑暗的地方,在那里你可以安装相机和三脚架。这个区域应该有一张桌子或长凳来支撑拍摄的物品。
Warning: Ultraviolet (UV) light can cause serious damage to the eyes and skin. Always wear appropriate UV protection when using UV lights. Never look directly at a UV light source.
First, find a completely dark location where you can set up a camera and tripod. This area should have a desk or bench to support the item being photographed.
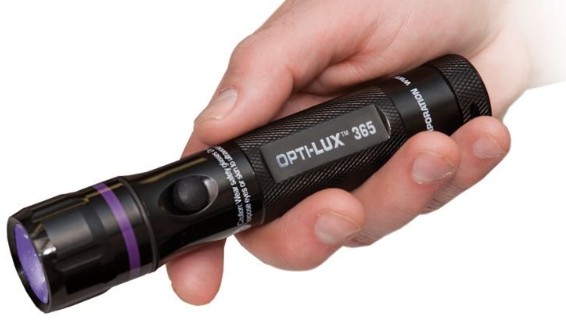
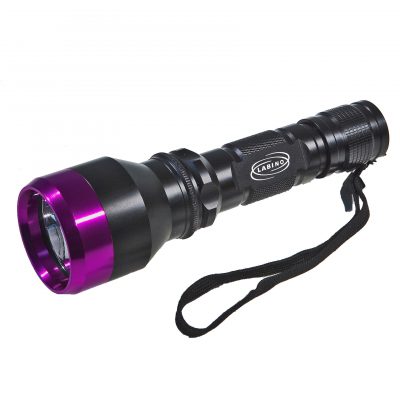
如果你想像我这样拍摄荧光照片,你需要订购一个紫外线手电筒,你的手电筒应该发射365纳米的紫外线。我使用的紫外线手电筒是我在xepu.cn上购买的一个22美元的简单迷你紫外线手电筒(XEPU-1530B 365nm迷你手持手电筒)。
拿起一个小的LED手电筒,在大约5500 K(正常日光)下发光。这个手电筒将用于创建您的自然颜色参考图像。
一旦你拿到了紫外线手电筒,等到晚上,再去寻找能发出365纳米紫外线荧光的物品。看看你所在地区的花、植物、岩石或地衣,看看什么看起来很有趣。一些人造物品也会发出荧光,所以看看你的房子周围,看看你能找到什么。
Order a UV flashlight. If you want to record images like the ones I have created, your flashlight should emit UV light at 365 nanometers (nm). The UV flashlight I used was Fluorescence Flashlight purchased on xepu.us (the XEPU-1530B 365nm Mini Handheld Torch).
Pick up a small LED flashlight that emits light at about 5500 K (normal daylight). This flashlight will be used to create your natural color reference images.
Once your UV flashlight arrives, wait until the evening or night and go searching for items that fluoresce with 365 nm UV light. Look at flowers, plants, rocks, or lichen in your area to see what looks interesting. Some man-made items also fluoresce so take a look around your house and see what you can find.
收集一些物品,把它们带到你的黑暗区域。
将相机和三脚架放在桌子或长凳附近,将一件物品放在干净的黑色表面上。我用了一块黑色的泡沫芯,但任何不会发出荧光的东西都可以。
关闭房间的灯,用紫外线手电筒照亮物体,看看哪些部位值得拍照。把房间的灯重新打开。
Collect a few items and bring them into your dark area.
Set up your camera and tripod near the table or bench and place one item on a clean black surface. I used a black piece of foam-core but anything that won’t fluoresce will work.
Turn off the room lights and illuminate the object with your UV flashlight to see what parts are interesting to photograph. Turn the room lights back on.

放置物品、相机和镜头,使感兴趣的区域充满框架。我在数码单反上使用了100毫米微距镜头,效果很好。
关闭相机的自动对焦系统,手动对焦对象(相机在黑暗中不会对焦)。
将相机的“白平衡”设置为“日光”设置或5500 K(不要使用“自动白平衡”)。
如果可以的话,请将相机设置为录制RAW图像;这将为您提供尽可能好的图像质量。如果您的相机只能记录JPG图像,请将其设置为高质量。
将相机设置为在手动曝光模式下录制图像。
将您的镜头光圈设置为一个值,该值将为您提供所需的景深。我使用了F22的设置来增加景深,但你可以选择任何你想要的值。F值越高,曝光时间就越长。
将快门速度设置为20秒。这是一个很好的起点,但一旦你熟悉了曝光需要多长时间,你就可以改变它。你可以打开快门,然后通过调整打开手电筒的时间来控制曝光。
Position the item, camera, and lens so the area of interest fills the frame. I used a 100 mm macro lens on my DSLR which worked quite well.
Turn off your camera’s Auto Focus system and focus on the object manually (your camera won’t focus in the dark).
Set your camera’s White Balance to the Daylight setting or 5500 K (do not use Auto White Balance).
Set your camera to record RAW images if it is capable of doing so; this will give you the best image quality possible. If your camera can only record JPG images, set it to the highest quality setting.
Set your camera to record images in Manual exposure mode.
Set your lens aperture to a value that will give you the amount of depth of field you need. I used a setting of F22 for increased depth of field but you can choose any value you wish. The higher the F value, the longer the exposure will be.
Set the shutter speed to 20 seconds. This is a good starting point but you can change it once you become familiar with how long the exposures will need to be. You can leave the shutter open and then control the exposure by adjusting the length of time you have the flashlight turned on.
将相机的ISO设置设置为1000。这是一个很好的起点,但一旦你熟悉了程序,你就可以改变它。
设置相机,使其显示记录图像的直方图。当你在黑暗的房间里时,图像通常会在相机的显示屏上显示得更亮,所以直方图会显示你是否真的有很好的曝光。
使用电缆开关触发快门,或者使用相机的自拍器并将其设置为2秒延迟。
检查以确保您的对象仍在画框中并处于焦点中。
关闭房间的灯并启动摄像头。
Set your camera’s ISO setting to 1000. This is a good starting point but you can change it once you become familiar with the procedure.
Set up the camera so it shows the recorded image’s histogram. Images often appear much brighter in the camera’s display when you are in a dark room so the histogram will show you if you actually have a good exposure.
Use a cable switch to trigger the shutter or use the camera’s self-timer and set it for a 2-second delay.
Check to make sure your object is still in frame and in focus.
Turn off the room lights and trigger the camera.
Once the shutter is open, turn on the daylight-balanced flashlight and illuminate the object from different angles. I use a smooth arc motion around the front of the object so as to decrease the likelihood of shadows in the object. Note how long you illuminate the object and from what distance. You can alter both illumination time and distance to increase or decrease the image exposure.
Check the image histogram to determine if you need to increase or decrease the exposure.
Record another image making changes in your lighting technique. It will take a few tries to create a good exposure so be patient and try different distances and flashlight duration times.
After you have recorded a good natural color image, you are ready to record your Ultraviolet Induced Fluorescence image.
Don’t move the camera or change the focus.
Record your UV image in a similar fashion as the previous natural color image except this time use the UV flashlight to illuminate the object.
Check the histogram to make sure you have a good exposure. The UV exposure time will probably be different than your natural color exposure.
Once you have an image you are happy with, check the focus of both the natural color and UV images to make sure they are both sharp.
Repeat this process for all the objects you wish to photograph.
Note: Some UV lights also emit a fair amount of blue light and some sensors are sensitive to UV light so if you wish to only record pure induced fluorescence you will need to place a UV absorption filter in front of the camera’s lens to block the wavelengths coming from the UV lamp. I didn't use any filters for these images.
That’s it! Hopefully this guide was helpful as you take your first steps into the world of ultraviolet-induced fluorescence photography!


 添加微信咨询!